Image Optimizer
Loading tool…
About Image Optimizer
What is Online Image Optimizer?
The Online Image Optimizer is a remarkable tool at the SEO tools Centre (a tool station that contains all SEO tools for free and some paid also). It is used to optimize (resize) the image size without losing its quality. As a Seo professional you have knowledge that how image quality and size can affect your site. This tool will help you out in this and help you to maintain your site speed.
Image optimization helps a lot in SEO. If you have a site with no picture, it will look not more than crap, but if you have a site with the proper use of images, it will attract the audience to your site. They will curious to know about the product by seeing the image.

Why use this tool?
It is an essential question. Why you should use this tool as you have many other tools available in the market and some other methods are also there to help you out in this matter. The answer to this question is hidden in its specifications that are discussed below.
- It is manageable and easy to use the tool.
- It will handle multiple tasks at one time.
- The important feature is that it saves your time that you can spend doing something else.
- It will decrease the image size without losing its quality.
- It will give results in no time that make it a quicker tool than any other available online.
How does this tool work?
This Image resizes tool work on basic principles and helps you to resize image without losing quality online. When you upload an image by clicking the upload button, it starts analyzing the image size and quality. After that when you click the button compress or optimize it give an image with low size without losing the quality.
How to resize and compress an image
- Choose your image. Click Choose an image to resize / compress, or drag a picture onto the box. It is processed in your browser and never uploaded.

- Set the new size. The current width and height are filled in. Type a new Width; with Keep aspect ratio ticked, the height changes with it so the picture is not stretched. For a blog post, about 1200 pixels wide is usually plenty.

- Pick the format and quality. JPG suits photos, WebP usually gives the smallest file for websites, and PNG keeps sharp edges and transparency. Move the Quality slider down to shrink the file; around 70-80% is hard to tell apart from the original.

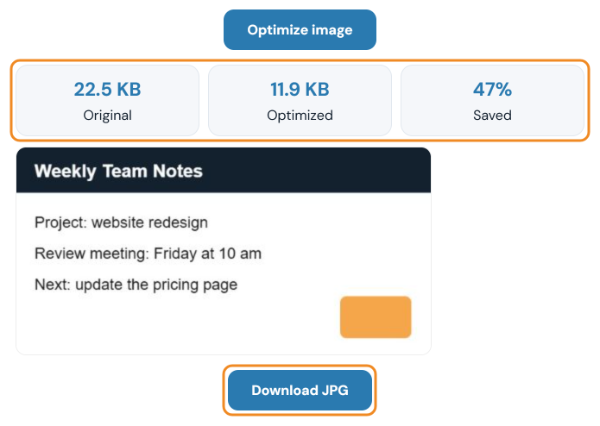
- Click Optimize image and download it. You see the original size, the new size and how much was saved, plus a preview. If you are happy with it, click Download; if not, change the settings and click Optimize image again.
Last updated: